We heard that it was the perfect time of year to photograph the poppies above Polly Joke beach. When we parked up there was a field of poppies in front of the car park, but there were already a lot of photographers there and so we carried on walking towards the beach. I wanted a view over the sea that I had seen from other photographers work. As soon as we got there I found this spot and got ready to shoot a panorama once the sky was just how I wanted it. As the sunset was quite strong I knew that one exposure wouldn't be enough, especially with my DX frame D7100. Therefore I shot one panorama slightly underexposing the foreground and another one exposed for the sky. Below, I will now go through the process of making the final image.
First Edits:
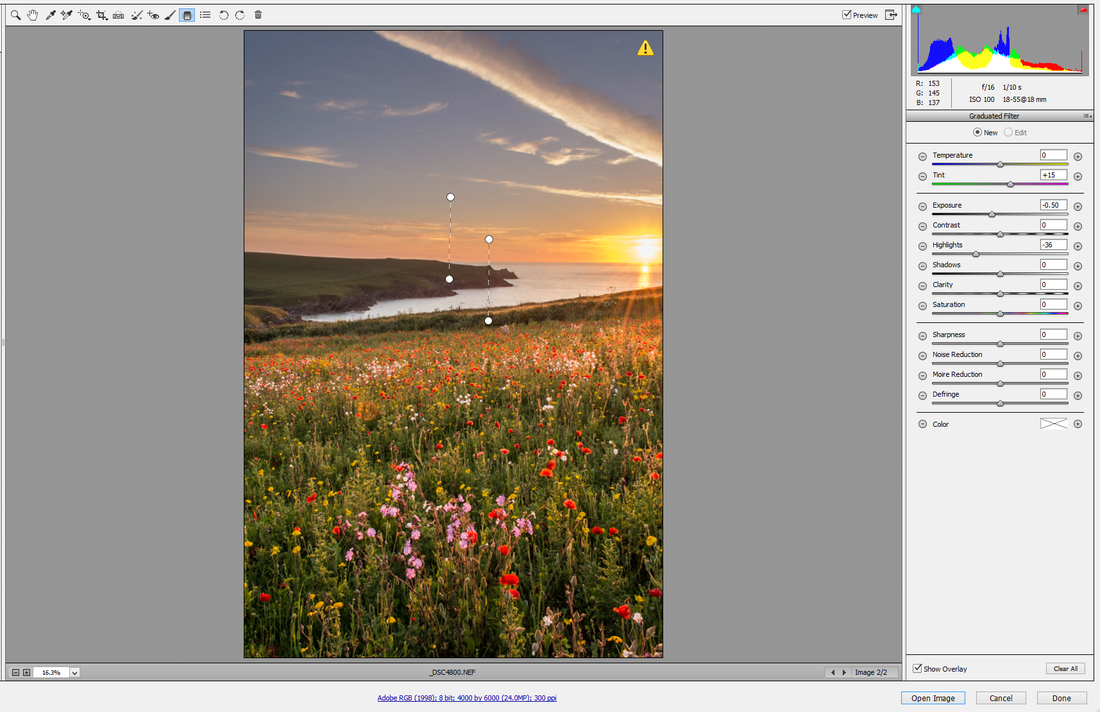
All of the raw files that go into one panorama need to have the same edit in order for the stitch to look consistent. With a single row panorama like this, I select the 'centre' (focal centre) of the image and start with a basic middle exposure, in which the ground and sky look okay. I then use a graduated filter edit for the ground and another for the sky. This is only thing that changes between pictures, and the only thing I change about them is the position of the gradient (to make sure they both meet at the horizon). For example, below you can see two images in which the horizon is in a different place, therefore I had to move the position of the filters, but not any of the settings.
The two white dots with a line between show the distance over which the filter effects fall off (i.e. graduation).
First Edits:
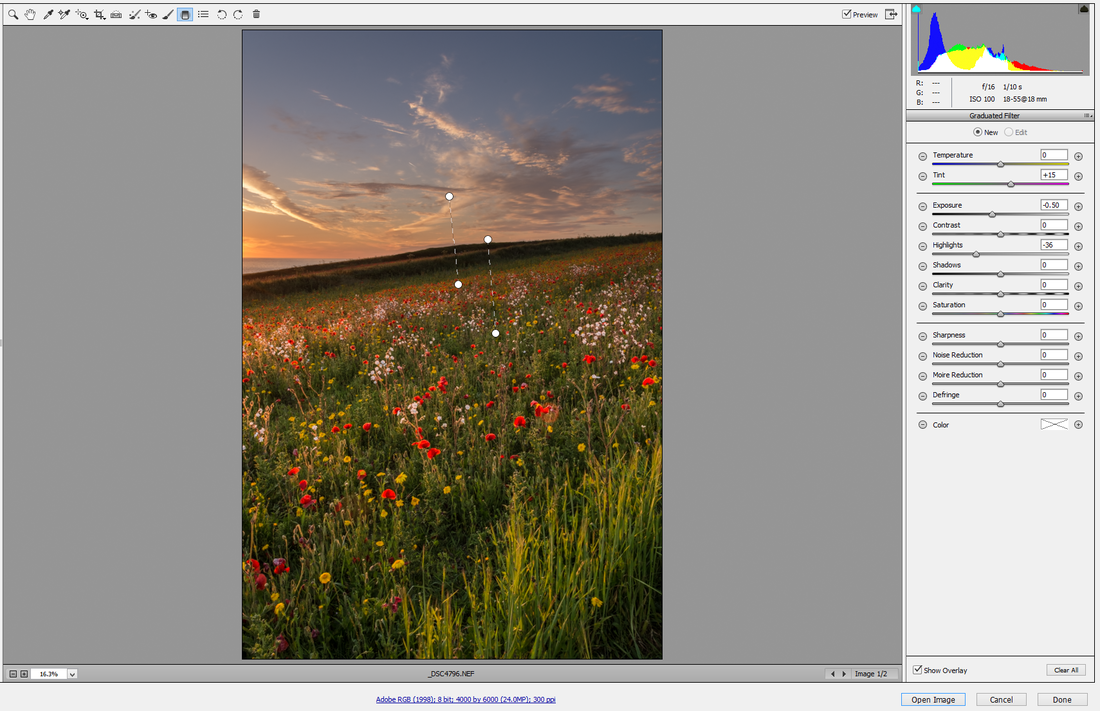
All of the raw files that go into one panorama need to have the same edit in order for the stitch to look consistent. With a single row panorama like this, I select the 'centre' (focal centre) of the image and start with a basic middle exposure, in which the ground and sky look okay. I then use a graduated filter edit for the ground and another for the sky. This is only thing that changes between pictures, and the only thing I change about them is the position of the gradient (to make sure they both meet at the horizon). For example, below you can see two images in which the horizon is in a different place, therefore I had to move the position of the filters, but not any of the settings.
The two white dots with a line between show the distance over which the filter effects fall off (i.e. graduation).
 |  |
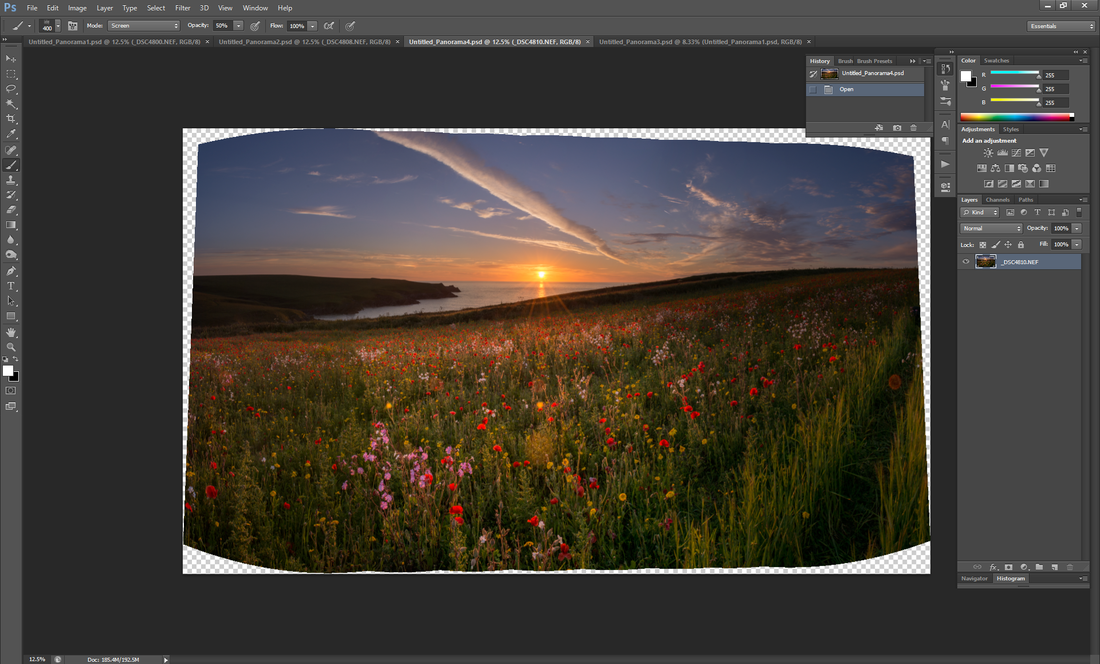
Stitching:
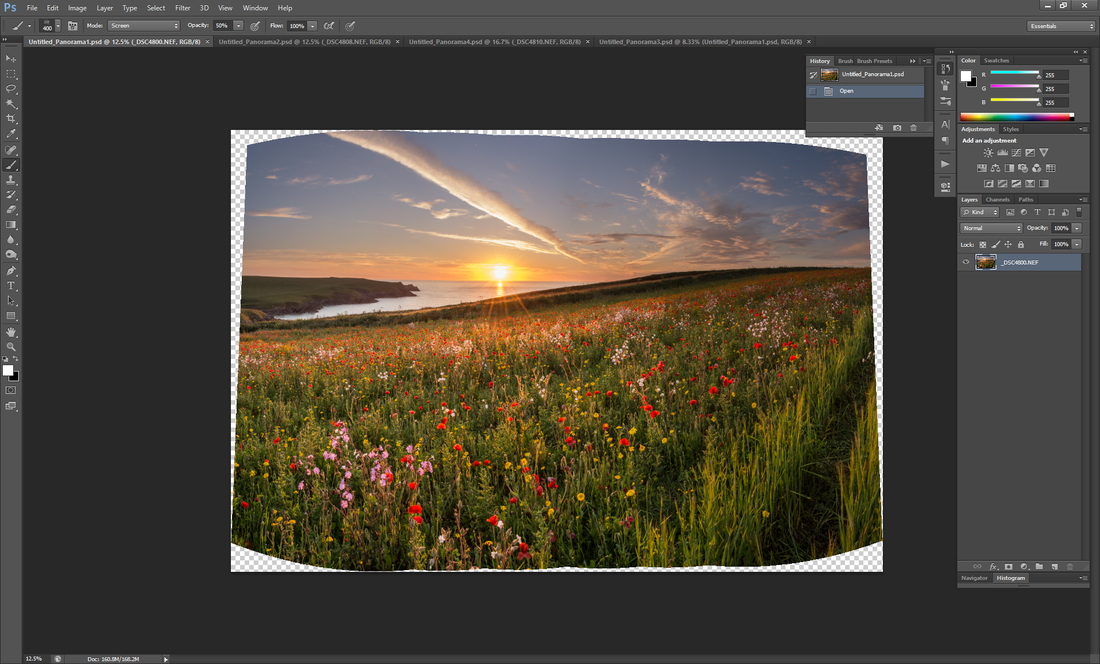
To stitch the images together open all of them required ones in Photoshop. Go to: file > automate > photomerge. Then select 'add open files' and personally, I like to keep it on auto mode and select 'blend images together'. Then start it and photoshop should give you a very well stitched panorama. Anything past CS3 seems to stitch very accurately, before that version and you could be pushing it.
Exposure 1:
Metadata: F/16 - 1/10th - ISO100
Photoshop had some trouble stitching the panorama together and so I had to make two and then combine those two into one final, full length panorama.
 |  |
I was very happy with how this came out from just one single exposure, but one thing was annoying me. On the right hand panorama the clouds leading away from the sun is blown out - you can see that the left hand side of that cloud is just a white stripe. This is why I took two panoramas with two different exposures.
Exposure 2:
Metadata: F/16 - 1/60th - ISO100
Here is that lower exposure. I didn't need to make this panorama the full length, as it was only the area around the sun that needed correcting. There isn't much to say about this part of the edit.
Exposure 2:
Metadata: F/16 - 1/60th - ISO100
Here is that lower exposure. I didn't need to make this panorama the full length, as it was only the area around the sun that needed correcting. There isn't much to say about this part of the edit.
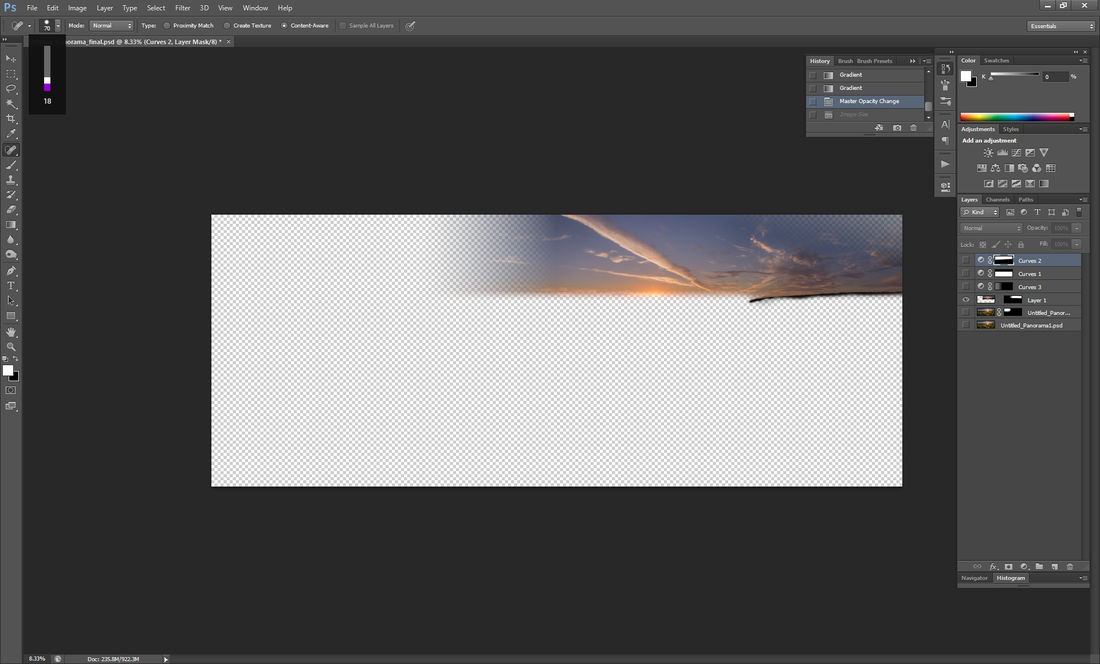
Blending:
Now comes the trickiest part, and that is to match the two exposure together. I have broken it down into a couple of steps.
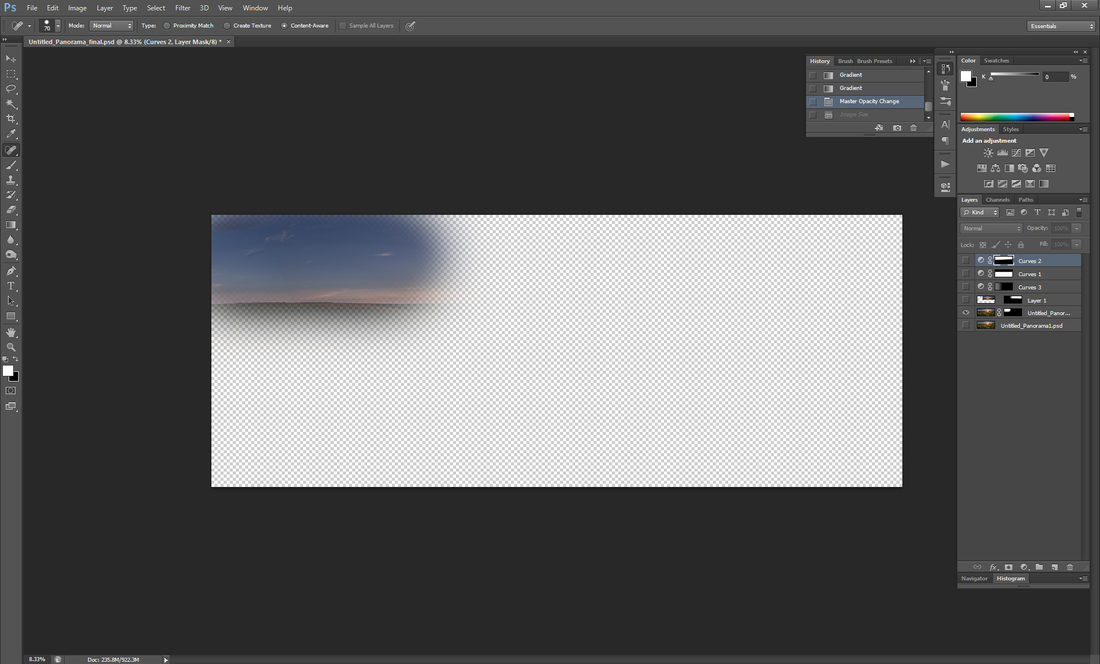
First of all I copied the darker image onto the lighter one and added a layer mask. I gradient tools to blend the sky down to the horizon, however I must have jogged the camera slightly as the two didn't quite line up. This meant that where the two images overlapped on the field to the top right of the image, it looked fuzzy. This took some time to get around but using a paint brush and my graphics tablet I eventually got it to look natural. As this darker panorama wasn't as wide as the lighter one I had to blend the left hand edge in. This took another gradient.
This brought up another problem in that the skies from the two images had a slightly different colour balance. To get past this I duplicated the background and added a layer mask. I then painted in the area that I wanted to affect (as you can see below) and played with the colours until they looked right.
The last step now was to make global adjustments (for the whole image) in regards to contrast/brightness/saturation. This is the part in which you get the image to look exactly how you imagined it.
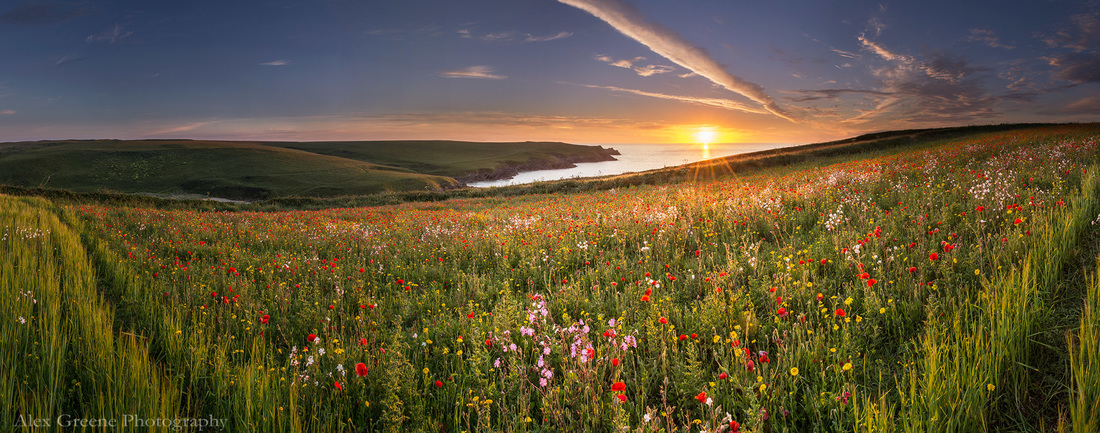
Here is the final image! I hoped that you like this blog post and I would love to know if you think I should carry on with this type of blogging (i.e. more tutorial based). I have another image which I would like to make a post about, it is of the North Cliffs and you can see it in the landscapes gallery.
Thanks for any likes, comments and shares, it's much appreciated!