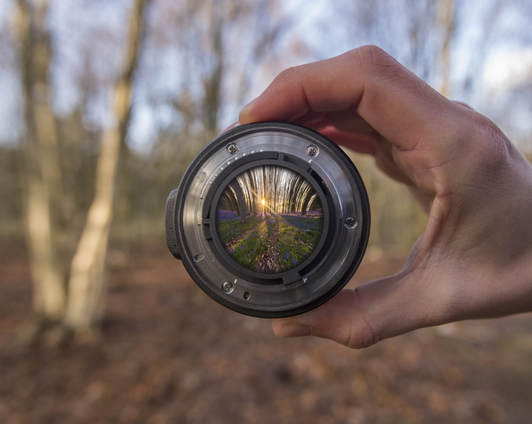
This is a fantastic compositing technique that is really quite simple to create and all you need is two images and inspiration for an idea! Mine was the feeling of looking forward to Spring, yours could be anything, but in case you’re stuck here’s one on me: ‘looking towards the future’ - see what you can do!
Putting the Idea Together
As you’ve probably guessed, there are two parts to creating this piece - the main image and the image inside of the lens. For the sake of this tutorial, I’m going to assume that you’re shooting a similar image to mine, one that shows a change in time or season. The easiest way to complete this composite project is to use an old photograph of yours for the image inside the lens. I looked through my old files and found an image of a stunning bluebell woodland at sunrise. This would make the perfect representation of a nice, warm and colourful location that makes me miss Spring. Yours could be a holiday location at sunset or a view over the fields where you walk the dog, anything that means something to you.
Equipment
It’s really quite simple, you need a camera and a spare lens. The camera could be a phone or a DSLR, but the wider the lens and the more control you have over the settings the better, and if you don’t have a spare lens, any charity shop should have old and mouldy lenses for next to nothing! You’ll also need an editing software that can handle layering, I’d recommend Adobe Photoshop, but there are alternatives out there. These next things aren’t essential, but they’ll make your life easier; firstly, a tripod to hold your composition steady and secondly, a remote shutter release to fire the camera once you’ve perfected the shot.
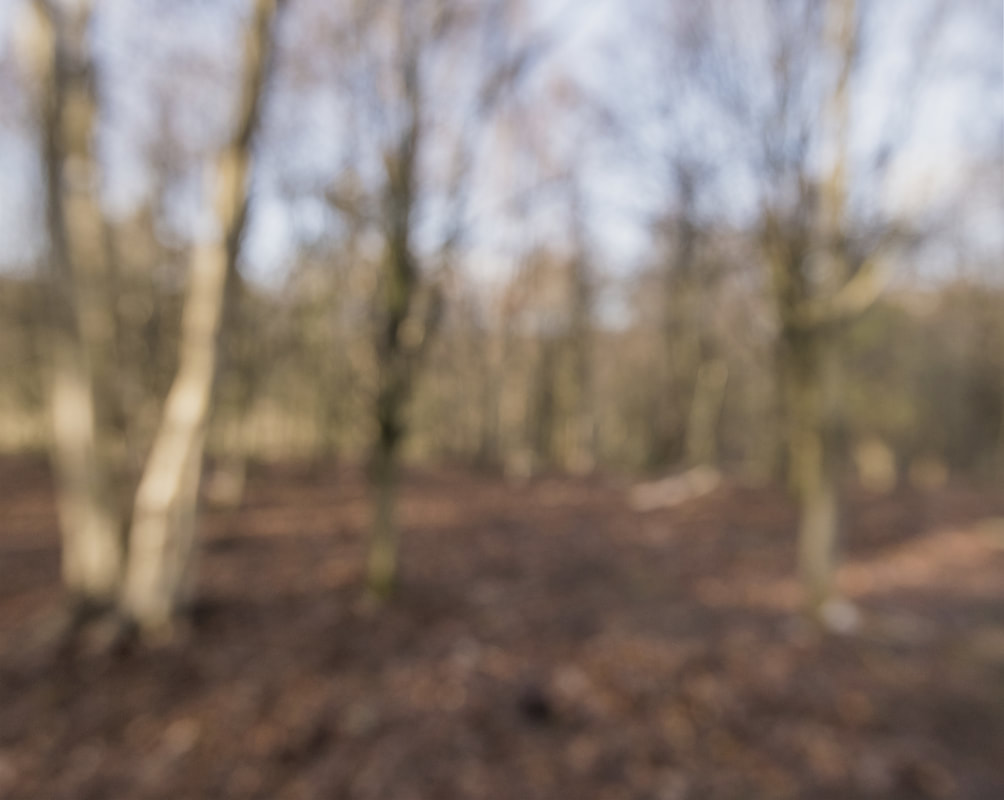
| Preparing the Photograph Let’s assume that, although it’s entirely possible to take this image on a phone camera or a simple point and shoot, you’re using a DSLR with manual or at least semi-automatic modes and a tripod to compose and stabilise the camera. Now you need to turn on Live View and set your lens to its minimum focus distance and this should create a scene that looks somewhat similar to mine. You’re now ready to introduce the lens into the image, so lets get the settings sorted! |
| The Settings These are only a recommendation of course and you will need to adjust the settings for the lighting on your shoot, however let me explain why settings similar to these are needed for this photo project. F/4 will create a good amount of separation between the subject and the background. This means you get a feel for what you are leaving behind for the landscape inside the lens without the details become distracting. Next up, ISO, I used ISO800 for my image because I was in a woodland which was sheltering me from a lot of the daylight and it is important to achieve a relatively quick shutter speed. A shutter speed of 1/250 should be able to freeze any small movements that you make whilst holding the lens. |
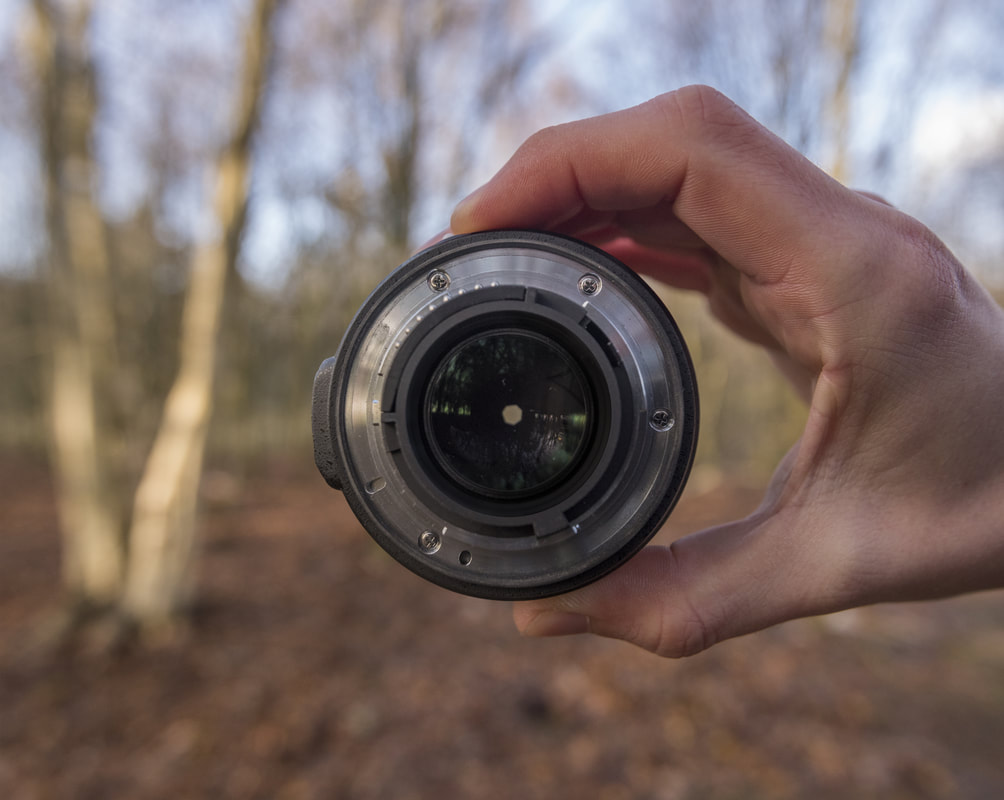
| Taking the Photograph If you’re camera has Live View this is where it’s going to be most useful because you can see whether you’re holding the lens in the correct place. If you’re using an aperture value around F/4 the depth-of-field will be quite small and so you’ll have to be careful to make sure that the back of the lens in in focus. For the best results you want to hold the lens as parallel to the camera as possible. |
Import and Basic Edit
From now on we’ll refer to the main image as IMAGE 1 and to the image inside of the lens as IMAGE 2. So, you’ve done the hard bit there’s only a few steps to the edit. Start by importing image 1 into Photoshop and giving it a basic edit. I chose to desaturate and darken my image slightly to help it contrast against the colourful and bright Spring scene in image 2. You can always go back and adjust the image 1 once the images are merged.
From now on we’ll refer to the main image as IMAGE 1 and to the image inside of the lens as IMAGE 2. So, you’ve done the hard bit there’s only a few steps to the edit. Start by importing image 1 into Photoshop and giving it a basic edit. I chose to desaturate and darken my image slightly to help it contrast against the colourful and bright Spring scene in image 2. You can always go back and adjust the image 1 once the images are merged.
Preparing the Image Inside the Lens
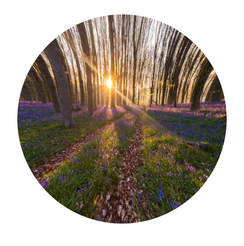
Image 2 needs some distortion before it can be placed inside the lens. If you were to look through a curved piece of glass, the scene would be contorted and stretched at the edges, so we need to apply this effect.
Start by opening image 2 and cropping it to be square. Follow this going to ‘Filter’, down to ‘Distort’ and then selecting ‘Spherize’. A popup box will appear, you can try ‘-75’ to begin with, although other amounts may suit your image more. This is now ready to copy over onto image 1. To copy this area, use the elliptical marquee tool, hold down shift and click and drag from the very top left corner of the canvas down to the bottom right - use Ctrl+C to copy and then open image 1 and use Ctrl+V to paste. You can now hide this layer by clicking the small eye on the left of the new layer in the layers panel.
Preparing the Lens for Image 2
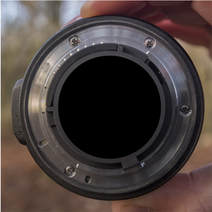
Image 1 is nearly ready but first you need to prepare the area that image 2 is going to sit upon. To do this, zoom in on the lens and use the elliptical marquee tool (+ SHIFT) to create an even circular selection inside the back of the lens. You will then go to the bottom of the layers panel, click on the small half black/half white circle and select solid colour and change the colour to black. This will fill the small circle you created with black, we do this so that we can blur the edge of image 2 and help it look realistic. You now need to re-arrange the layers slightly - simply click and drag the layer called ‘Color Fill 1’ underneath the layer named ‘Layer 1’. See left.
Image 1 is nearly ready but first you need to prepare the area that image 2 is going to sit upon. To do this, zoom in on the lens and use the elliptical marquee tool (+ SHIFT) to create an even circular selection inside the back of the lens. You will then go to the bottom of the layers panel, click on the small half black/half white circle and select solid colour and change the colour to black. This will fill the small circle you created with black, we do this so that we can blur the edge of image 2 and help it look realistic. You now need to re-arrange the layers slightly - simply click and drag the layer called ‘Color Fill 1’ underneath the layer named ‘Layer 1’. See left.
The Final Steps
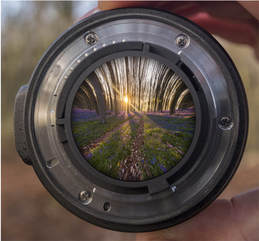
Select the layer containing image 2 and use Ctrl+T to start transforming the layer. Now shrink and move image 2 so that it lays on top of the black circle you created on the back of the lens. The last stage is to blur the edges of image 2. To do this select ‘Layer 1’ in the layers panel and then select the ‘Magic Wand Tool’ (W) and click anywhere outside of the circle of image 2. You have now selected the area surrounding image 2 and so it needs inverting - either use Ctrl+Shift+I or select ‘Inverse’ in the ‘Select’ menu. To blur this selection either use Shift+f6 or go to ‘Select’ > ‘Modify’ > ‘Feather’ and input a value of ‘50’ to begin with. If, after the next stage, the blur is too little or too much simply use the history window to back up a couple of stages and try another feather value. All you need to do now is apply a layer mask to image 2 and the image is complete, do this by clicking the small rectangle at the bottom of the layers panel that contains a small circle. Image 2 should now look similar to the image to the right of this paragraph.
Select the layer containing image 2 and use Ctrl+T to start transforming the layer. Now shrink and move image 2 so that it lays on top of the black circle you created on the back of the lens. The last stage is to blur the edges of image 2. To do this select ‘Layer 1’ in the layers panel and then select the ‘Magic Wand Tool’ (W) and click anywhere outside of the circle of image 2. You have now selected the area surrounding image 2 and so it needs inverting - either use Ctrl+Shift+I or select ‘Inverse’ in the ‘Select’ menu. To blur this selection either use Shift+f6 or go to ‘Select’ > ‘Modify’ > ‘Feather’ and input a value of ‘50’ to begin with. If, after the next stage, the blur is too little or too much simply use the history window to back up a couple of stages and try another feather value. All you need to do now is apply a layer mask to image 2 and the image is complete, do this by clicking the small rectangle at the bottom of the layers panel that contains a small circle. Image 2 should now look similar to the image to the right of this paragraph.
Thanks for reading, I hope this has been a useful tutorial. Feel free to let me know your thoughts in the comments and let me know how the project has gone for you!

